Join us on Discord Follow on Twitter Buy us a coffee Follow the journal
Introduction
You will learn: Survive Load Order Disorder by knowing how to use the In-game Mods Manager to download Fallout 4 mods from the Bethesda.net website on any platform, including Xbox (One, S, X, Series S, and Series X) PlayStation (4 and 5), and PC (Steam and Game Pass).
These instructions assume the player has already read the Mod Description on the mod website and any other documentation on Bethesda.net, Nexusmods.com, AFKMods.com, or any other mod site where the mod can be downloaded.

Player Responsibility
Bethesda and mod authors make it clear that the player is responsible for their own games. Mods are downloaded at the player's own risk and are subject to Bethesda's Terms of Service regardless of where you download from or what mod manager you use. If you do not agree to the terms, do not download mods.
Bethesda Account Required
Signing up for a Bethesda account goes beyond the purpose of this article. The Bethesda support site has detailed instructions on how to link a Steam account, a Playstation account, and an Xbox account.
Navigating the Bethesda Website
There are two mod sites on the Bethesda website. One is for Fallout 4 and the other is for Skyrim Special Edition. Both sites function the same way, and so does the In-game Mods Manager for both games.
"All Mods" Tab
The All Mods tab lists all the mods available for download with the In-game Mods Manager. You can use the filters on the side of the page to find the mods you want and the search under the magnifying glass to search for specific mods.
"My Mods" Tab
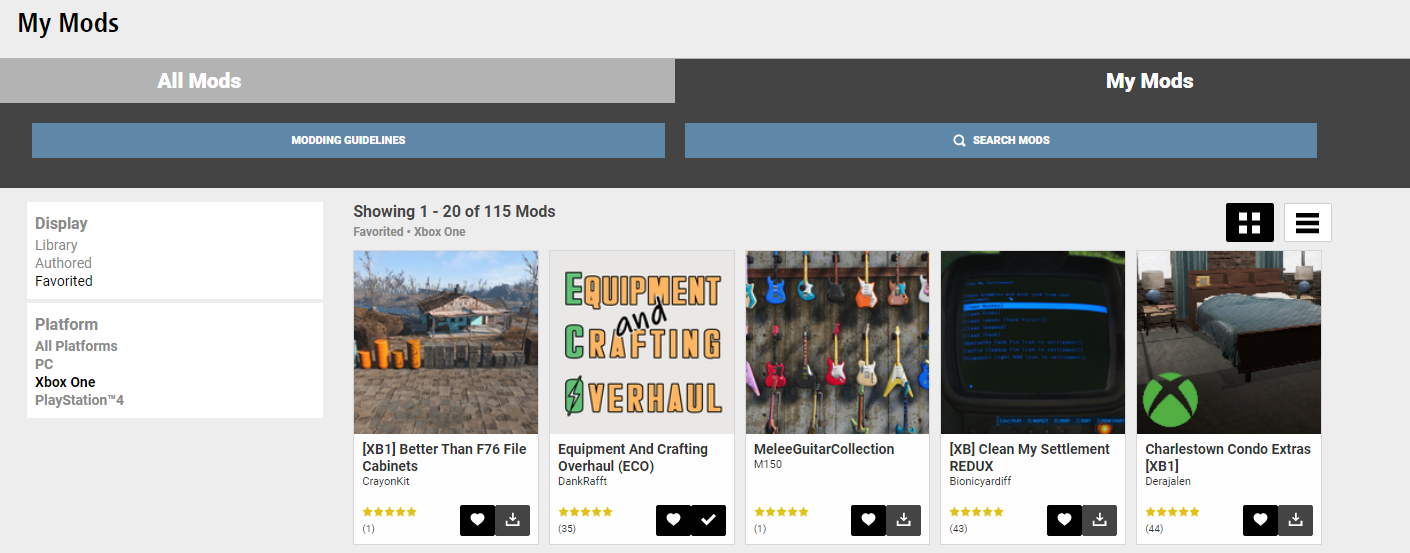
The My Mods tab lists all mods you have added to your Library, to your Favorites, or have uploaded to the website using the Creation Kit. The mods under these categories show up in the In-game Mods Manager under My Library, My Favorites, and My Creations.
The My Mods tab takes some effort to get used to. To filter by Display and by Platform, you must first select the display and then the Platform. Mods will be ordered by the date of when the mod was last updated or when its description was last changed (whichever is "Latest").
You can search through your mods from this tab as well.
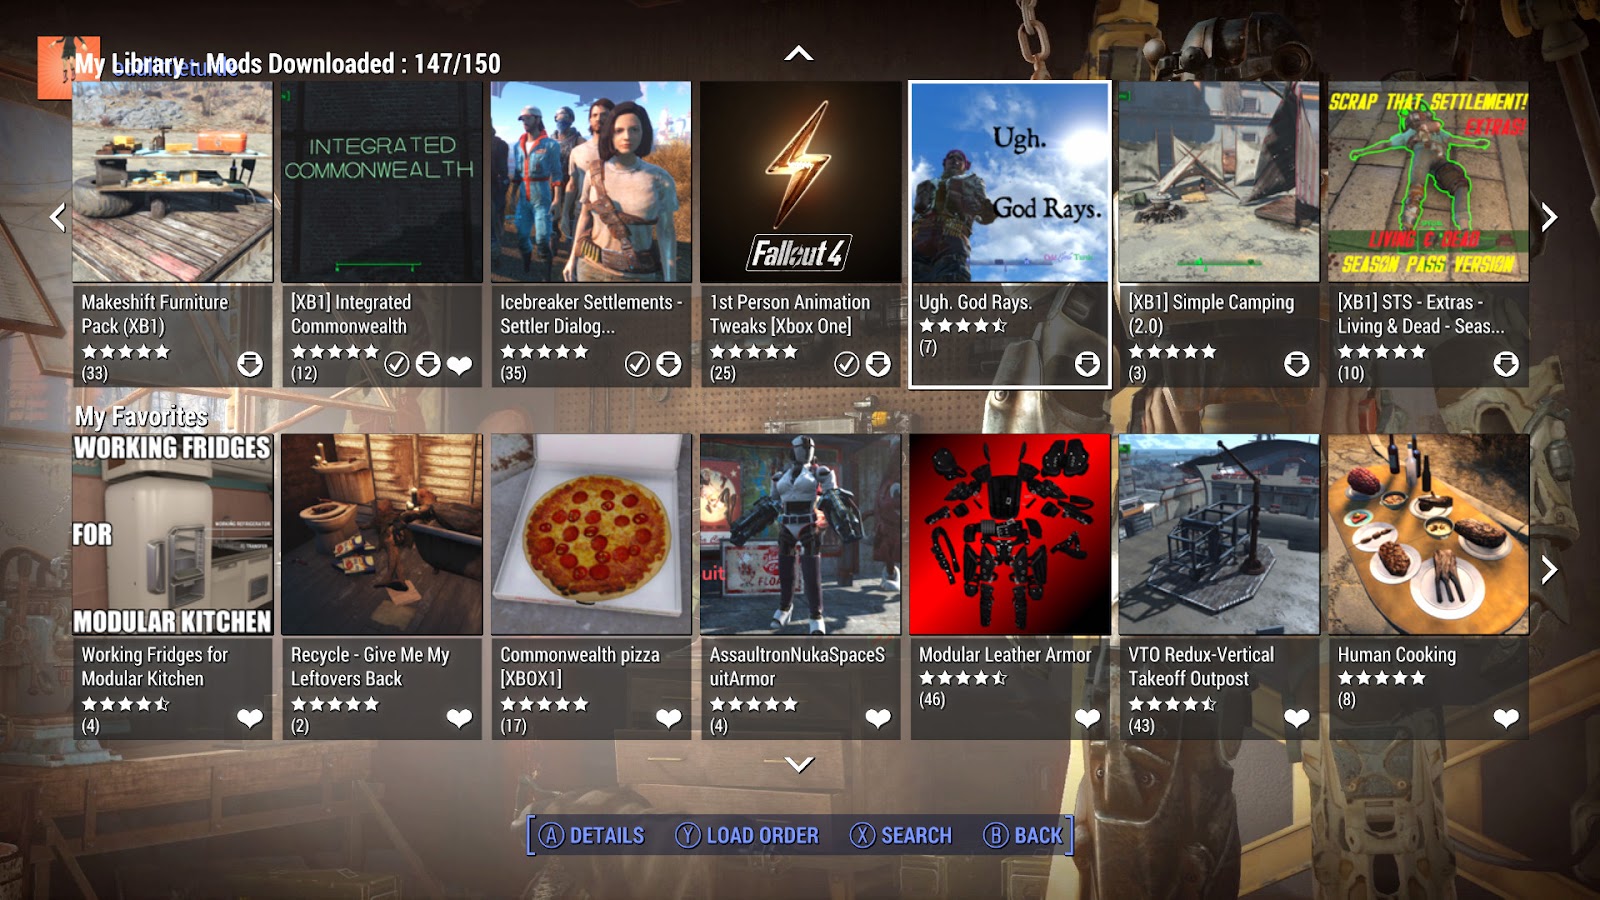
Navigating the Mods Manager

The In-game Mods Manager is found under the Mods option from Fallout 4's Main Menu.
While it may seem a bit cluttered, it is organized by Featured, My Library, My Favorites, and then the categories as set by Bethesda begin. My Library and My Favorites will not show up until you have downloaded or selected mods for these categories.
You can filter mods by date and popularity.
- Featured Mods - Each month, Bethesda features new mods on their blog. These show up under this category.
- My Library - Mods that you have downloaded or previously downloaded.
- My Favorites - Mods that you have favorited from in-game or from the Bethesda.net website.
At the bottom of the screen, you are given four (4) options and the ability to scroll through the Mods using your Controller (or Mouse if on PC).

- Details - Once you select a mod, you can navigate to the Mod Details Page.
- Load Order - The Load Order Page is where you set your game save's load order.
- Search - You can search for mods from in-game. Give newly updated or uploaded mods about an hour to itinerate through all the website's regions. A mod is offered to many countries simultaneously and on busy days, it takes a while. You cannot search for mods in progress from the website or from in-game due to WIP being works in progress and only downloaded by beta testers.
How do I Add a Mod?
The In-game Mods Manager is the same across all platforms for ease of use and the instructions are the same.
These instructions will have you use the Bethesda.net website first and then go in-game to add the mod to your load order as it is easier to Build your Framework and then download in load order rather than download willy-nilly and then have to re-sort.
Building your Framework on your Framework worksheet beforehand will help you to keep up with your load order before you download mods. It will also help you to avoid data remnants or "Ghost Space" in the event you download two mods that have the same name.
Step One - Add the Mod to My Favorites
Step One - Add Mod to My Favorites
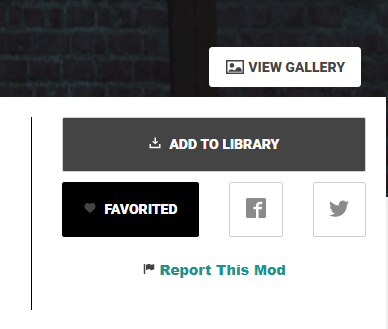
From the Bethesda.net website, save the mod you wish to download to your Favorites.
- Navigate to the mod page on Bethesda.net you wish to download.
- Find and Select the Favorite Button.
The mod you have chosen is now favorited and the website will present a pop-up confirming this. The pop-up will be green. If it is red, try again. The button will read Favorited upon success.
The mod will now show up under My Favorites in-game and also when sorting the My Mods tab by Favorites.
3. Proceed to Step Two.
Only a maximum of 98 mods will show up under the My Favorites category in the In-game Manager. PC users may extend this with an ini setting added to their Fallout4Custom.ini file. PC and Xbox players can use Ugh. Mods Manager Cap. to extend their favorites to 700.
 The Overseer
Step Two - Navigating My Favorites
Step Two - Navigating My Favorites
Now that you've added mods to your Favorites from the Bethesda.net website, it's time to use the In-Game Mods Manager.
- Run Fallout 4.
- From the Main Menu, navigate and select Mods.
- From the My Favorites Menu, select the Mod you wish to download.
- Select Details.
- Proceed to Step Three.
Step Three - Download from the Mod Details Page

From the Mod Details Screen, you are presented with two options – Unfavorite and Download. When selecting a mod that has not been favorited, the options will be Favorite and Download.
If the mod is a Master file, it will jump to the top after you select it again. It can then be disabled and sorted appropriately at the top of your load order.
Step Three - Download Mod from the Mod Details Page
- From the Mod Details Page, scroll down and select Download.
- Wait for the mod to download.
- Disable the mod by selecting it and pressing Disable.
After a mod has been downloaded, the option to Download is replaced by Disable.
4. Proceed to Step Four.
Step Four and Step Five - Adjust Load Order and Reload Data Files
Instructions below are for a Single Mod. If downloading multiples, note that Operation Cannot Be Completed can occur if you do not back out to the Main Menu at regular intervals to Refresh the Data files before continuing to download more mods. As you get used to how the manager works and what mods require what, it will be come easier.
Step Four - Adjust Load Order
- From the Load Order Page, adjust the load order in accordance with your Framework and the Load Order Categories.
- Exit to the Main Menu to reload the game's Data files.
- Return to the Load Order Page.
- Enable mod by selecting them and pressing Enable.
- Proceed to Step Five.
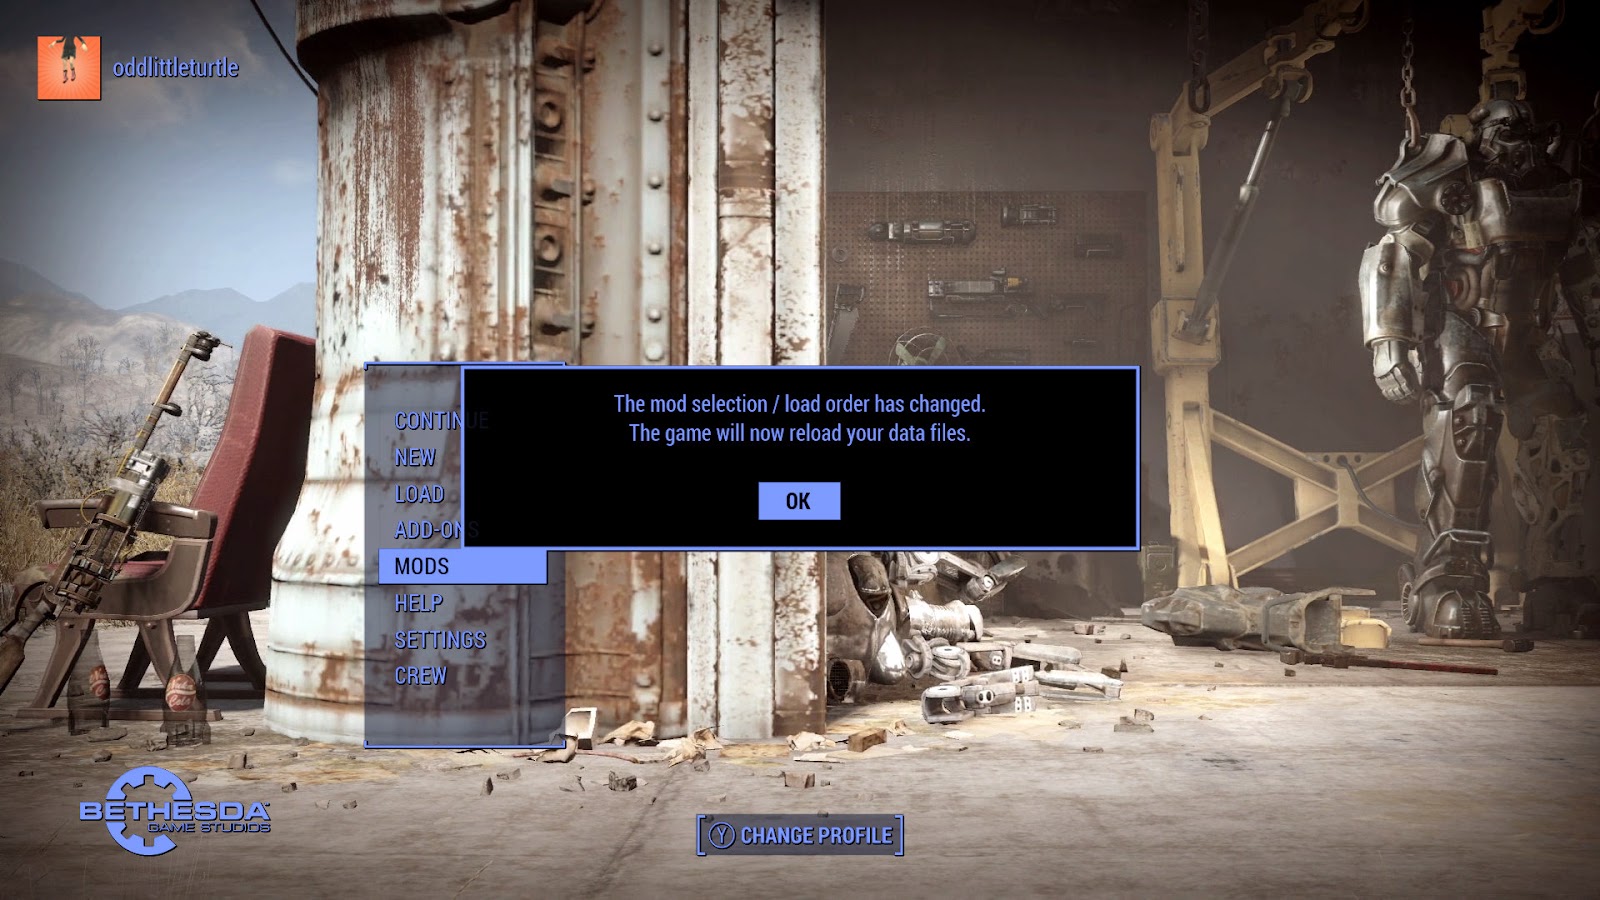
Step Five - Reload the Data Files
- Return to the Main Menu. by using the Back button.
- Select Ok to allow Data Files to Reload.
Repeat the above steps as necessary.
If you've been downloading large amounts of textures, power cycle the console to clear the cache so weird glitches or bugs do not occur.
Vault Girl
Adjusting Load Order Using the In-Game Manager
You must have already downloaded a mod to make adjustments to your load order. Adjusting Load Order is done from the Load Order Page.
Follow the Framework you’ve created.
Step One - Adjust Your Load Order
- From the Main Menu, select Mods.
- From the In-game Mods Manager, select Load Order.
- Highlight a mod and press the Select.
- Scroll with either your controller or mouse to move the mod to the position listed on your Framework.
- Proceed to Step Two.
Step Two - Reload the Data Files
- Return to the Main Menu. by using the Back button.
- Select Ok to allow Data Files to Reload.
- Quit the game completely.
- Restart your console or clear your cache if you've recently downloaded, disabled, or deleted mods.
- Return to your game or start a new game.
How Do I Disable a Mod?

There is a difference between disabling and deleting a mod. One completely removes the mod from your system and the other simply removes it from your savegame.
Vault Girl
If you are disabling a mod for troubleshooting purposes know that if the mod is scripted, it may well break the save you're trying to salvage. There is no such thing as a "clean" save if you've already had mods on that save.
Vault Girl
How Do I Disable a Single Mod?
Disabling is done from the Mod Details Page or the Load Order Page. If you have a large load order, it is easier to disable from the Load Order Page.
When disabling, first clean up any saves associated with the mod to keep the HUD from keeping the latest save in persistent memory. If you are disabling for troubleshooting purposes, skip Step One, but be advised that not returning to a save prior to disabling could cause more game bugs than helping to salvage your save.
Step One - Clean up your saves
⚠️ Disabling a mod changes the load order and makes any saves with the mod on it obsolete.
- From the Main Menu, select Load.
- Choose the character you wish to Load.
- Select and Delete the saves associated with the mod you wish to Disable.
- Return to the Main Menu.
- Proceed to Step Two.
Step Two - The Load Order Screen
- From the Main Menu, select Mods.
- Select Load Order.
- Select the Mod you wish to Disable.
- Select Disable.
- Proceed to Step Three.
Step Three - Reload the Data Files
- Return to the Main Menu. by using the Back button.
- Select Ok to allow Data Files to Reload.
- Proceed to Step Four.
Step Four - Clear your cache and update your Library
- Quit the game completely.
- Clear your cache.
Xbox Players:
Take this opportunity to clear your reserved space to clear out any extra garbage files left behind after deleting mods. Clean up your Library and Favorites from the Bethesda.net website. You can add and remove mods from there as you Build your Framework on your worksheet.
After you've re-built your Framework, you are ready to download in load order from the In-game Mod Manager and then start a New Game.
PlayStation Players:
Take this opportunity to Rebuild the Database if you have not done so in a while. Clean up your Library and Favorites from the Bethesda.net website. You can add and remove mods from there as you Build your Framework on your worksheet.
After you've re-built your Framework, you are ready to download in load order from the In-game Mod Manager and then start a New Game.
PC Players:
You do not have a cache to clear like console players do, but take this opportunity to clean up the My Mods Tab on the Bethesda.net website. you can add and remove mods from your Library and Favorites as you re-build your Framework.
How Do I Disable All Mods In My Load Order?
Disabling All Mods is done from the Load Order Page.
Step One - Clean up your saves
⚠️ Disabling a mod changes the load order and makes any saves with the mod on it obsolete.
- From the Main Menu, select Load.
- Choose the character you wish to Load.
- Select and Delete the saves associated with the mod you wish to Disable.
- Return to the Main Menu.
- Proceed to Step Two.
Step Two - Disable All Mods
- From the Load Order Page, select Options.
- Choose Disable All Mods.
- Wait for Mods to Disable.
- Proceed to Step Three.
Step Three - Reload the Data Files
- Return to the Main Menu by using the Back button.
- Select Ok to allow Data Files to Reload.
- Proceed to Step Four.
Step Four - Clear your cache and update your Library
- Quit the game completely.
- Clear your cache.
Xbox Players:
Take this opportunity to clear your reserved space to clear out any extra garbage files left behind after deleting mods. Clean up your Library and Favorites from the Bethesda.net website. You can add and remove mods from there as you Build your Framework on your worksheet.
After you've re-built your Framework, you are ready to download in load order from the In-game Mod Manager and then start a New Game.
PlayStation Players:
Take this opportunity to Rebuild the Database if you have not done so in a while. Clean up your Library and Favorites from the Bethesda.net website. You can add and remove mods from there as you Build your Framework on your worksheet.
After you've re-built your Framework, you are ready to download in load order from the In-game Mod Manager and then start a New Game.
PC Players:
You do not have a cache to clear like console players do, but take this opportunity to clean up the My Mods Tab on the Bethesda.net website. you can add and remove mods from your Library and Favorites as you re-build your Framework.
How Do I Delete A Mod?
Deleting a mod makes any save associated with it obsolete. First, clean up any saves to keep the game save data out of persistent memory.
How Do I Delete A Single Mod?
Step One - Clean up your saves
⚠️ Deleting a mod changes the load order and makes any saves with the mod on it obsolete.
- From the Main Menu, select Load.
- Choose the character you wish to Load.
- Select and Delete the saves associated with the mod you wish to Disable.
- Return to the Main Menu.
- Proceed to Step Two.
Step Two - Delete Mod from Mod Details Page
- Select Mods from the Main Menu.
- From the In-Game Mods Manager, find and highlight the mod you wish to delete.
- Select Details.
- Select Disable.
- Select Delete.
- Wait for mod to delete.
- Proceed to Step Three.
Step Three - Reload the Data Files and Clear your Cache
- Return to the Main Menu. by using the Back button.
- Select Ok to allow Data Files to Reload.
- Quit the game completely.
- Clear your cache.
How Do I Delete All Mods in My Load Order?
Step One - Clean up your saves
⚠️ Deleting a mod changes the load order and makes any saves with the mod on it obsolete.
- From the Main Menu, select Load.
- Choose the character you wish to Load.
- Select and Delete the saves associated with the mod you wish to Disable.
- Return to the Main Menu.
- Proceed to Step Two.
Step Two - Delete All Mods
- Select Mods from the Main Menu to enter the In-game Mod Manager.
- Select Load Order to bring up the Load Order Screen.
- From the Load Order Screen, select Options.
- Choose Delete All Mods.
- Wait for Mods to Delete.
- Proceed to Step Three.
Step Three - Reload the Data Files
- Return to the Main Menu. by using the Back button.
- Select Ok to allow Data Files to Reload.
- Proceed to Step Four.
Step Four - Clear your cache and update your Library
- Quit the game completely
- Clear your cache
Xbox Players:
Take this opportunity to clear your reserved space to clear out any extra garbage files left behind after deleting mods. Clean up your Library and Favorites from the Bethesda.net website. You can add and remove mods from there as you Build your Framework on your worksheet.
After you've re-built your Framework, you are ready to download in load order from the In-game Mod Manager and then start a New Game.
PlayStation Players:
Take this opportunity to Rebuild the Database if you have not done so in a while. Clean up your Library and Favorites from the Bethesda.net website. You can add and remove mods from there as you Build your Framework on your worksheet.
After you've re-built your Framework, you are ready to download in load order from the In-game Mod Manager and then start a New Game.
PC Players:
You do not have a cache to clear like console players do, but take this opportunity to clean up the My Mods Tab on the Bethesda.net website. you can add and remove mods from your Library and Favorites as you re-build your Framework.
Additional Information
Console Considerations
Please refer to the rest of the FAQ pages and the Survival Guide. It was designed with consoles in mind.
Console Troubleshooting
Vault Boy
How To Fix Operation Not Completed:
If you have downloaded a mod of the same name and switched to a mod that also has the same name, it will delete the plugin and leave behind external assets that take up room in your reserved space. You must delete the mod, delete the mod that left the assets behind properly, and then re-download the mod you want to change to.
The procedure below is long but returning to the main menu to reload the plugins between each download is vital. Clearing the cache is optional after the first time; however, if you still have "Operation Not Completed" errors, the steps must be done again and perhaps cache clearance is not optional for your specific hardware. It greatly depends on what mod has created the issue.
How to Fix Operation Not Completed (Console)
- Delete the mod you added.
- Return to the main menu
- Select OK to reload the data files
- Clear your Cache
- Re-download the old version of the mod
- Return to the Main Menu and select OK to reload the data files
- Clear your cache
- Return and delete the mod properly
- Reload your data files and clear the cache
- Return and download the correct version of the mod
PC Considerations
- Mods downloaded with the in-game manager are directly added to the Data Folder. Instructions for other mod managers go beyond the purpose of this article.
- Game Pass PC management is different than Steam management. F4SE is not supported on Game Pass PC installs; however, players can still enjoy mods uploaded to the Bethesda.net site. You can politely submit a request to a mod author to upload their non-F4SE plugin to the Bethesda.net site for downloading.
- Mod file size is not tracked by the in-game manager unless the external assets are packed in BA2 archives. Modded load orders with only BA2 and no loose files do not require archive invalidation. There is a BA2 texture archive limit. You can surpass the BA2 limit by going over 255 plugins with texture archives.
- There is no limit on how many mods you can download using the mod manager. There is a limit on how many you can use: 253 plugins including the six DLC and any Creation Club .ESM DLC, and up to 4096 small ESL plugins.
- Do not download mods of the same name using two separate mod managers. Delete or remove the old mod from your data folder before attempting to download the same mod from the Bethesda website.
PC Troubleshooting
Vault BoyHow to Fix Operation Not Completed:
Downloading mods from one site that have the same name as a mod downloaded from the Bethesda website will result in the plugin file being deleted from the Data Folder. It will leave behind any additional files, such as a .BA2 or .ini file.
Mods such as Creative Clutter, Armor Keywords, Armorsmith, Unified Clothing Overhaul, and mods that have been ported over are mods that may cause this issue, but it is an easy fix if you encounter it.
The best way to avoid this is to delete the mod with your third-party manager before downloading with the in-game manager.
Step One - Manual Downloads
- Remove the external asset files from your Data folder.
- Remove the mod from Plugins.txt. Ensure Plugins.txt stays writeable.
You will find Plugins.txt under %AppData%\Local\Fallout4\Plugins.txt
There should not be a .manifest file if you have manually downloaded the file; however, should there be an issue with it, you will find it under Steam\steamapps\common\Fallout 4\Mods.
Step One - Game Pass PC/MS Store
- Remove the external asset files from your Data folder.
- Remove the mod from Plugins.txt. Ensure Plugins.txt stays writeable.
You will find Plugins.txt under %AppData%\Local\Fallout4\Plugins.txt
Should there be an issue with the .manifest files, you will find them under XboxGames\Fallout 4\Mods. Returning to the in-game mod manager will repopulate the Mods folder.
Step One - Third-Party Mod Managers
- Delete the mod with your chosen mod manager.
- Ensure that Plugins.txt no longer lists the mod and that Plugins.txt is writeable.
- If there is a .manifest file from downloading mods from the Bethesda.net site, you may need to delete it.
You will find Plugins.txt under %AppData%\Local\Fallout4\Plugins.txt
You will find .manifest files under XboxGames\Fallout 4 (PC)\Mods or Steam\steamapps\common\Fallout 4\Mods.
Step Two - All Users
- Enter the game, go to Mods > Load Order.
- Double-check that the mod is no longer listed on the screen. If it is still listed, select Details > Delete
- Return to the Main Menu in order to reload the Data files in order to refresh Plugins.txt.
- Select Ok to Reload the Data files.
- Quit the game completely.
- Return to the Load Order screen and check for the mod again.
- Re-download the mod.
You may need to restart your computer or clear temporary files depending on your hardware.
Problematic Start-up Mods
Mods that have not been implemented properly for start-up are problematic and should be avoided. If a mod that adds a holotape is not set up properly or if a mod that disables the precombines around the Vault 111 cell cause issues, do not use.
Check the date of mods. If they have been ported, be sure to use due diligence to examine the dates. Mods that have not been updated on other sites since 2016 that add holotapes or have large amounts of bug reports might need to be retired from your load order or might already be obsolete. Mods that were created in the beginning should be considered learning mods of the mod authors who have gone on to make others. In most cases, they have learned from their mistakes or have updated to fix bugs.
Definitions
Extension
In computing, an "extension", "file extension", or "filename extension" is a group of letters occurring after a dot (period) in a file name indicating the format of the file. In the case of Bethesda game modification data files for consoles those letters are .ESM, .ESP, and .ESL.
For example, game mods could be named MyGreatestModEver.esm, MyGreatestModEver.esp, or MyGreatestModEver.esl.
.ESL file extensions, regardless of what the mod manager says, will load before any master files (such as the Unofficial Fallout 4 Patch) even if you cannot place them there inside the manager. They still count towards the 100/150 mod limit.
Further Information
If you have any questions or need clarification regarding downloading or using the in-game manager, please join us on Discord. We'll be happy to answer any questions or provide guidance.